Babylist Registry Integration Program
The Add to Babylist button is an easy way to let your users add the products you sell to their Babylist Registry without having to leave your site or install the Babylist Extension.
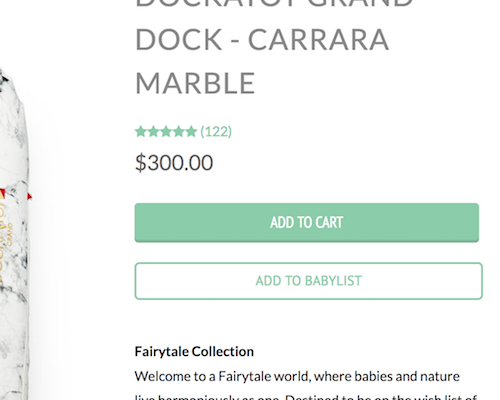
To take a look at a live integration visit our Best Car Seats Guide and click the "Add to Babylist" button next to any of the products recommended in that guide.
Setup
1. Include add.js library on your site
Include the following two lines on each page that you want to include the "Add to Babylist" functionality on. These only need to be on the page once even if there are multiple products on the page. A good spot to add these would be just before the closing </body> tag or in the footer of your website.
<script type="text/javascript">window._bl = { partner: 'INSERT YOUR DOMAIN NAME HERE' };</script>
<script async type="text/javascript" src="https://www.babylist.com/add.js"></script>
2. Create an Add to Babylist button/link
The add.js script that you loaded in step one will create an object on window named bl. This object has a single method that you will call to trigger the Add to Babylist modal - bl.addToBabylist(productInfo)
The productInfo object describes the product that will appear in the Babylist modal.
{
  images: String | Array[String], // Multiple images allow visitors to choose the image they like best.
  price: String,                  // Price of the item on your website.
  title: String,                  // Title of the item include color, size, etc.
  url: String,                    // URL to direct gift givers to when purchasing this item.
  scraped_data: Array[Object]     // Additional product metadata as an array of key-value pairs
}
The simplest integration is shown below using an <a> tag. If you are using a javascript library/framework you may invoke this function however you would like.
For example, for the Pampers Swaddlers product:
<a id="AddToBabylist" href="javascript: bl.addToRegistry({
    images: 'https://images.contentful.com/50gzycvace50/1Veh4XV50gkQyM6Kw0QesY/8d31bf62a4540bc5dc7b6a85d118e738/pampers-diapers.jpg',
    price: '24.69',
    title: 'Pampers Swaddlers Size 1 (8-14 lb)' ,
    url: 'https://www.example-url.com/dp/123456'
});">Add to Babylist</a>
To include additional product metadata, include these as key-value pairs in the scraped_data array:
<a id="AddToBabylist" href="javascript: bl.addToRegistry({
    images: 'https://images.contentful.com/50gzycvace50/1Veh4XV50gkQyM6Kw0QesY/8d31bf62a4540bc5dc7b6a85d118e738/pampers-diapers.jpg',
    price: '24.69',
    title: 'Pampers Swaddlers Size 1 (8-14 lb)' ,
    url: 'https://www.example-url.com/dp/123456',
    scraped_data: [
      { key: 'gtin', value: '123456789012' },
      { key: 'sku', value: 'SKU-123' },
      { key: 'brand', value: 'Pampers' },
      { key: 'availability', value: 'InStock' }
    ]
});">Add to Babylist</a>
Here's the code you'll want to copy into your product page:
<a id="AddToBabylist" href="javascript: bl.addToRegistry({
    images: 'INSERT YOUR PRODUCT IMAGES HERE',
    price: 'INSERT YOUR PRODUCT PRICE HERE',
    title: 'INSERT YOUR PRODUCT TITLE HERE',
    url: 'INSERT YOUR PRODUCT URL HERE',
    scraped_data: [
      { key: 'gtin', value: 'INSERT YOUR PRODUCT GTIN HERE' },
      { key: 'sku', value: 'INSERT YOUR PRODUCT SKU HERE' },
      { key: 'brand', value: 'INSERT YOUR PRODUCT BRAND HERE' },
      { key: 'availability', value: 'INSERT YOUR PRODUCT AVAILABILITY HERE' }
    ]
});">Add to Babylist</a>
You may need to add CSS classes, ids or other styles to get the <a> tag to match your site. A successful integration will be functional, match your site and display the product in our modal.
User Flow
When a user clicks on the 'Add to Babylist' button on your site Babylist will check to see if the user is already logged into Babylist:
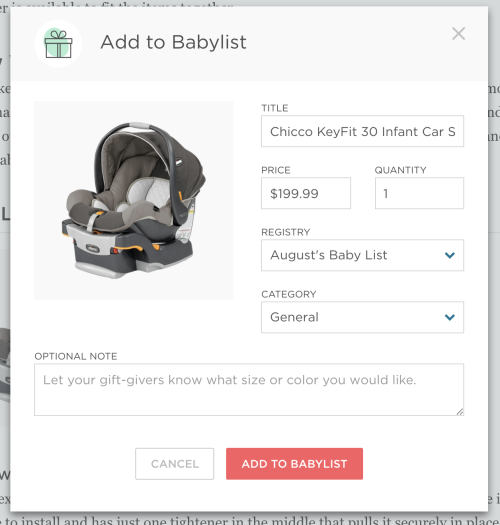
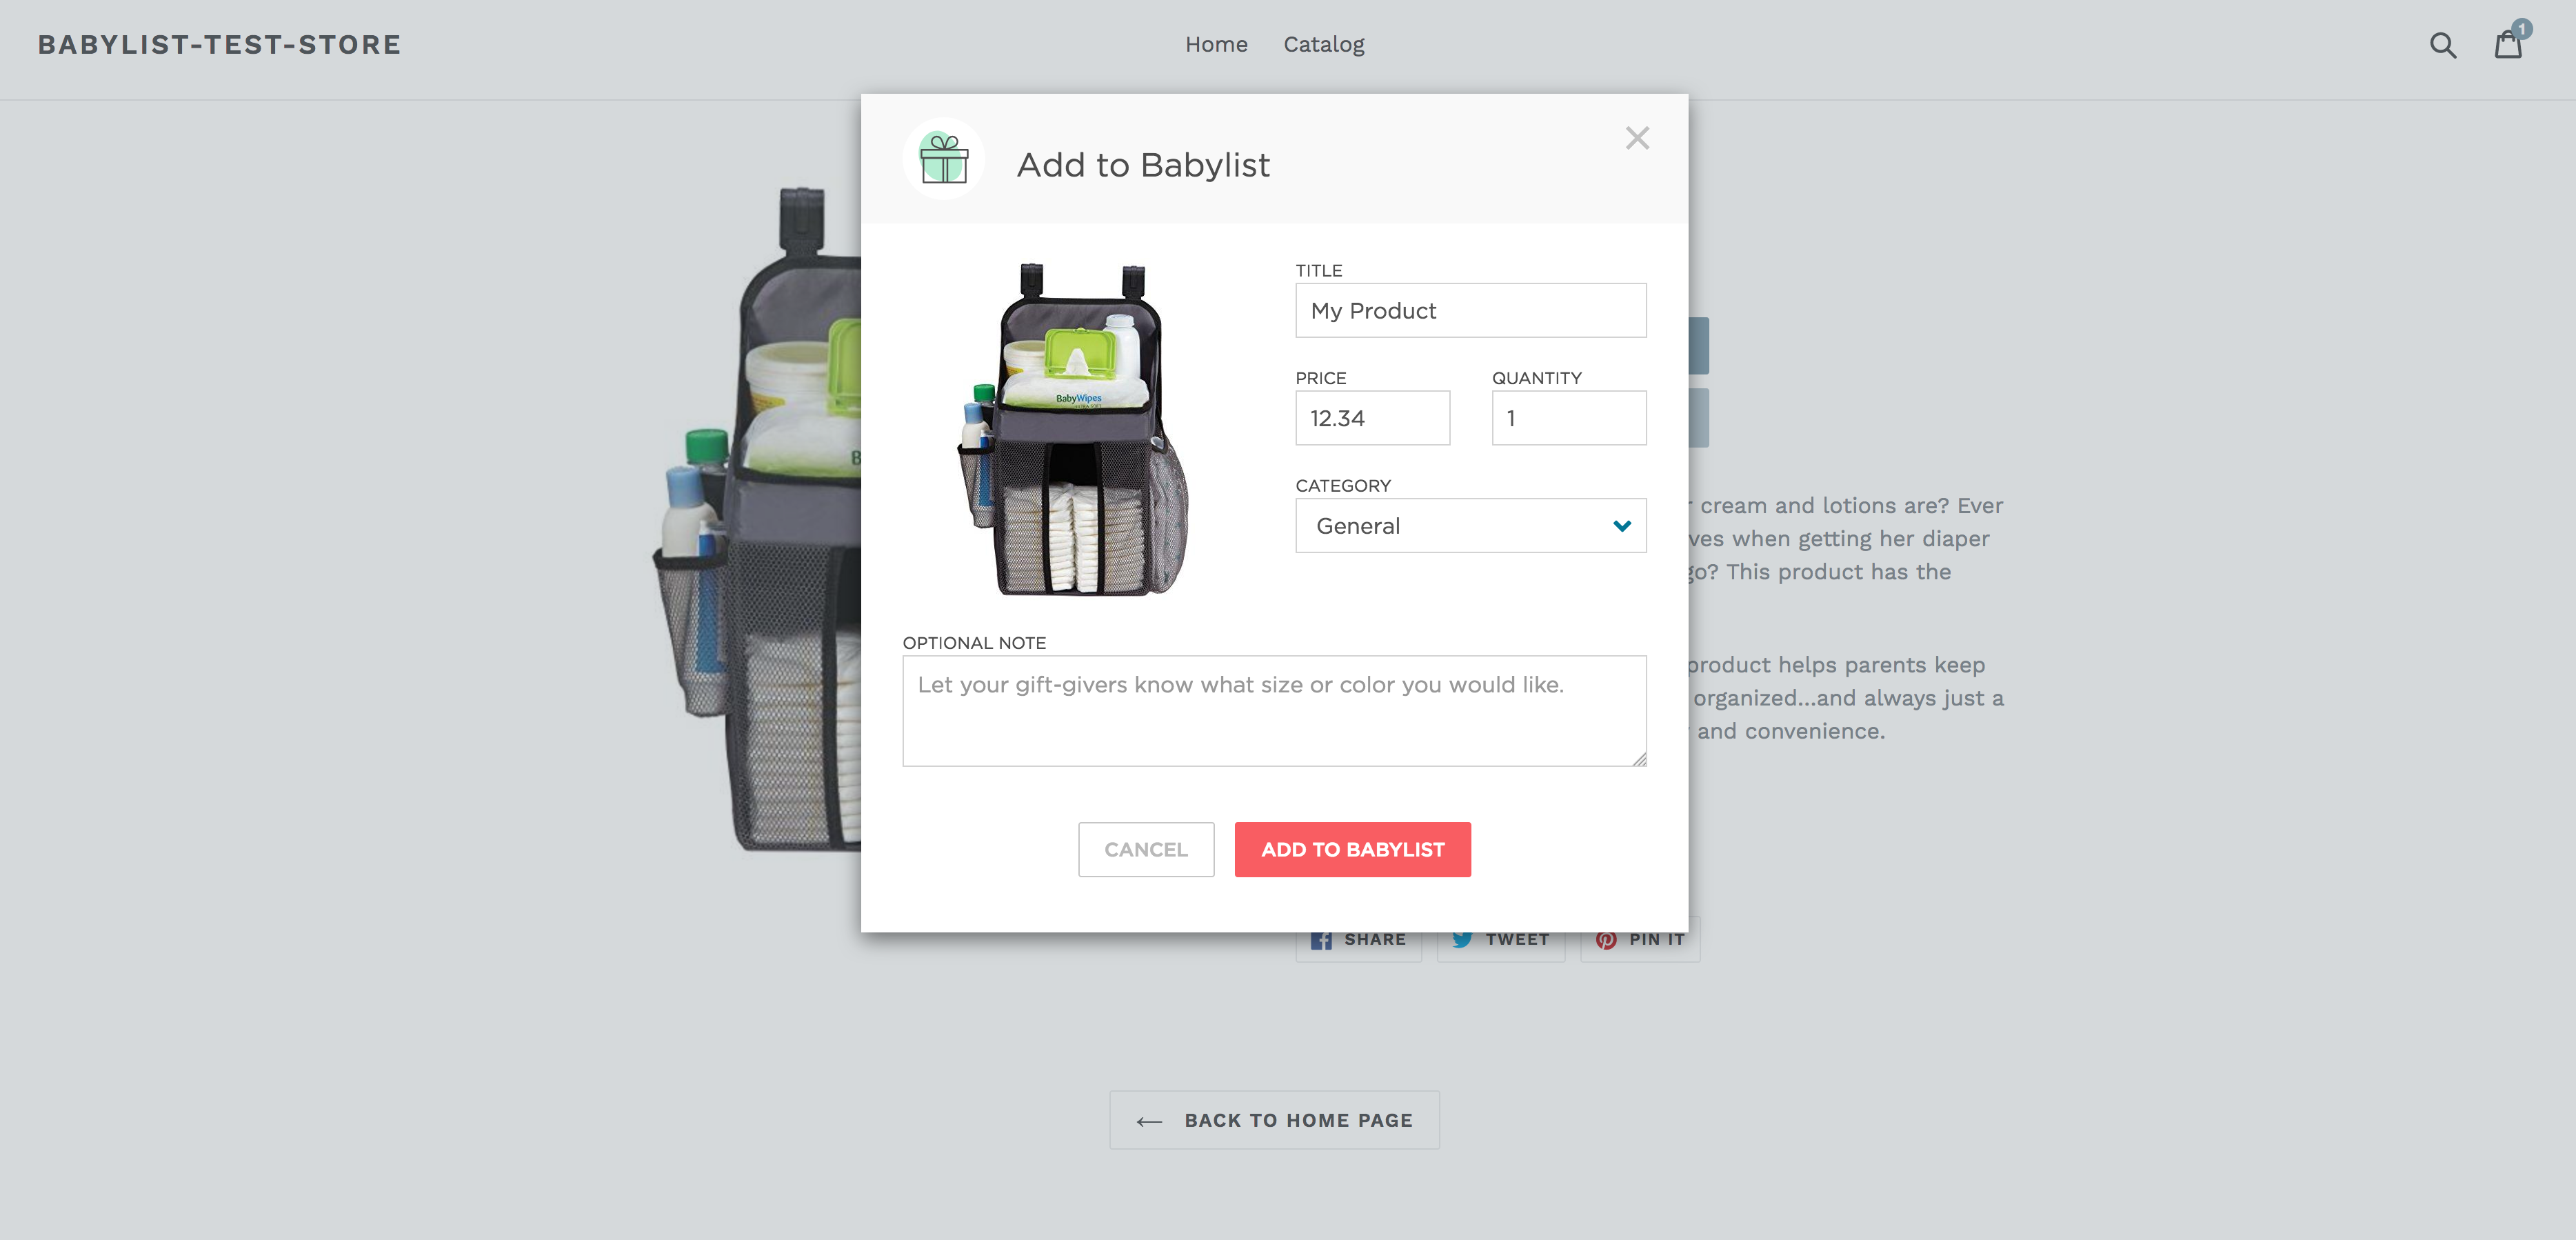
When User Is Logged Into Babylist
The Babylist modal will instantly be displayed showing the product. The user may edit any of the fields and then save the item to their Babylist registry.
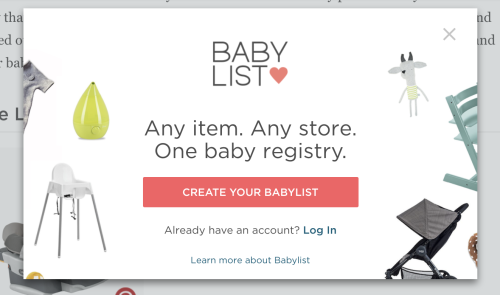
When User Is Not Logged Into Babylist Or Does Not Have An Account
They will see a modal prompting them to create a registry or log in.
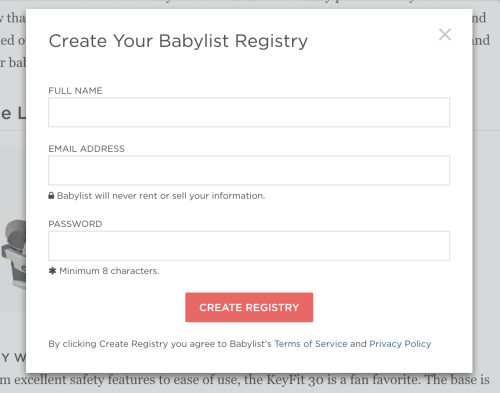
Once the user creates an account or logs in they will then see the Add to Babylist modal shown above.
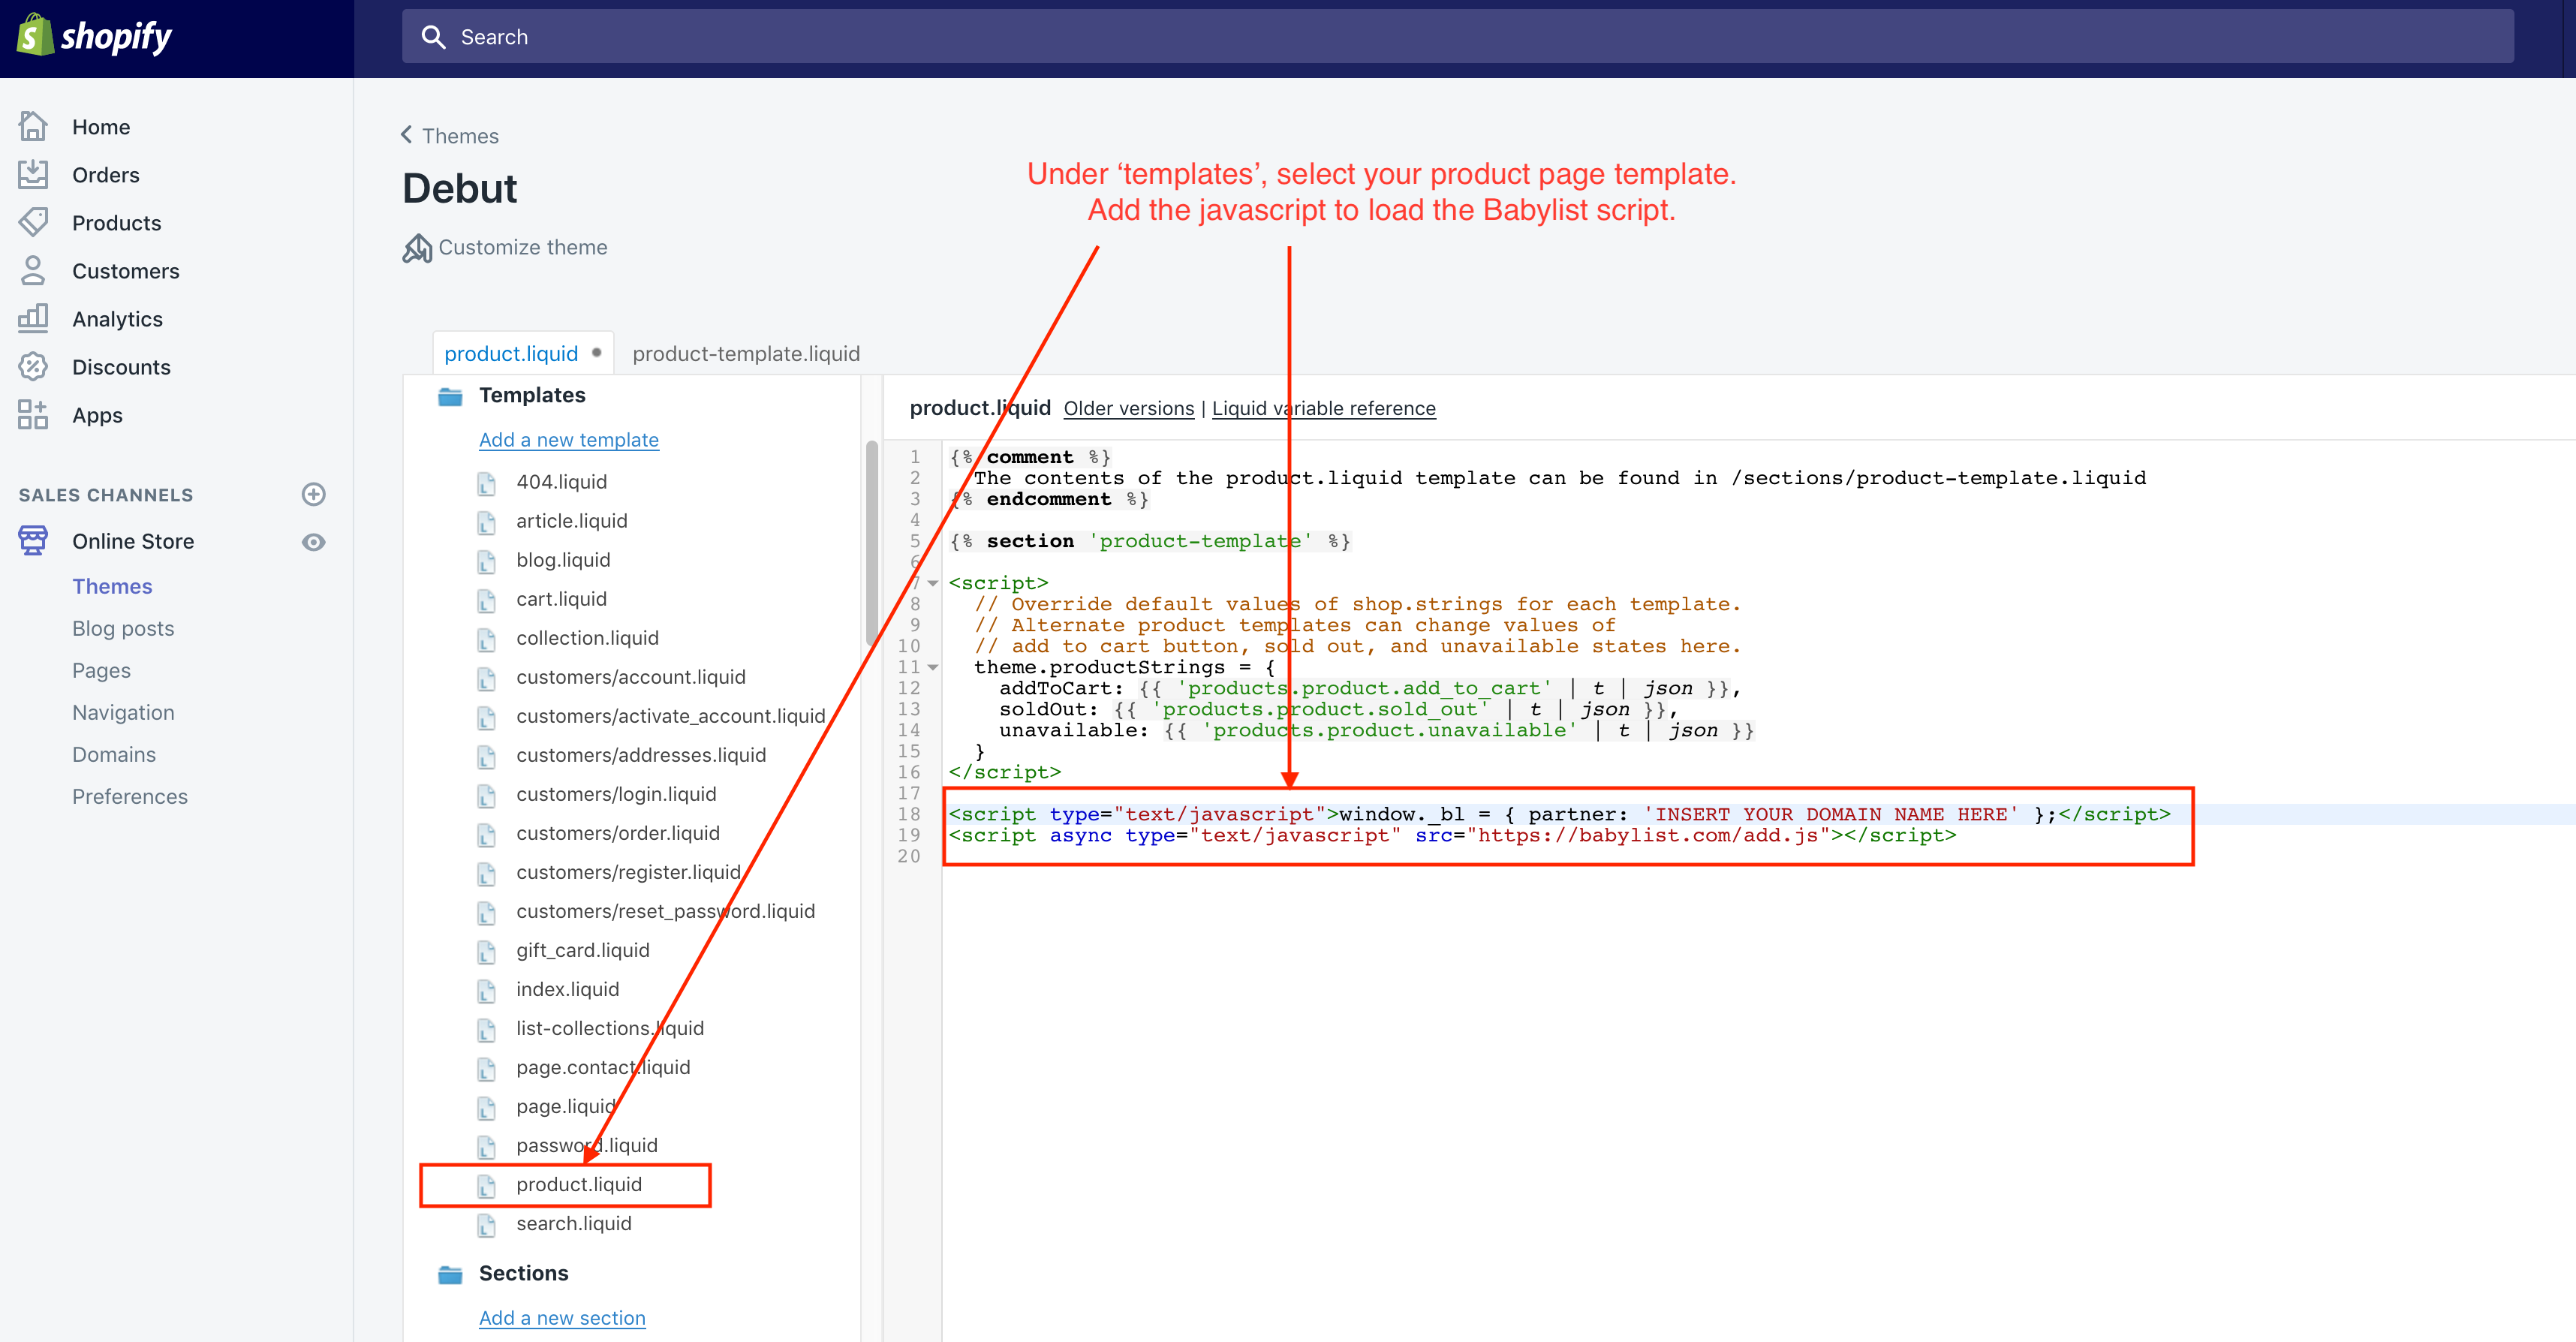
Instructions for Inserting on Shopify Product Pages
This set of instructions walk you through setting up the Babylist button on a Shopify product page. Note, you will need to adjust these instructions slightly if your theme is named or laid out differently than the example theme.
1. Include add.js library on your site
Navigate to your product template and add the script tags to load the add.js script.
2. Create an Add to Babylist button/link
In the product 'Section', you can add the following code to insert the babylist button on ALL product pages. We specify shopify specific variables to send us information about your product. If a product has multiple variants i.e. sizes or colors, refer to the working with variants section.
<a id="AddToBabylist" class="btn" style="margin-bottom: 10px; width: 300px"
     href="javascript: bl.addToRegistry({
                    images: '{{ product.featured_image.src | img_url: "800x" }}',
		    price: '{{ product.selected_or_first_available_variant.price | money_without_currency }}',
		    title: '{{ product.title | escape }} {{ product.selected_or_first_available_variant.title | escape }}',
		    url: '{{ shop.url }}{{ product.selected_or_first_available_variant.url }}'
     });">Add to Babylist</a>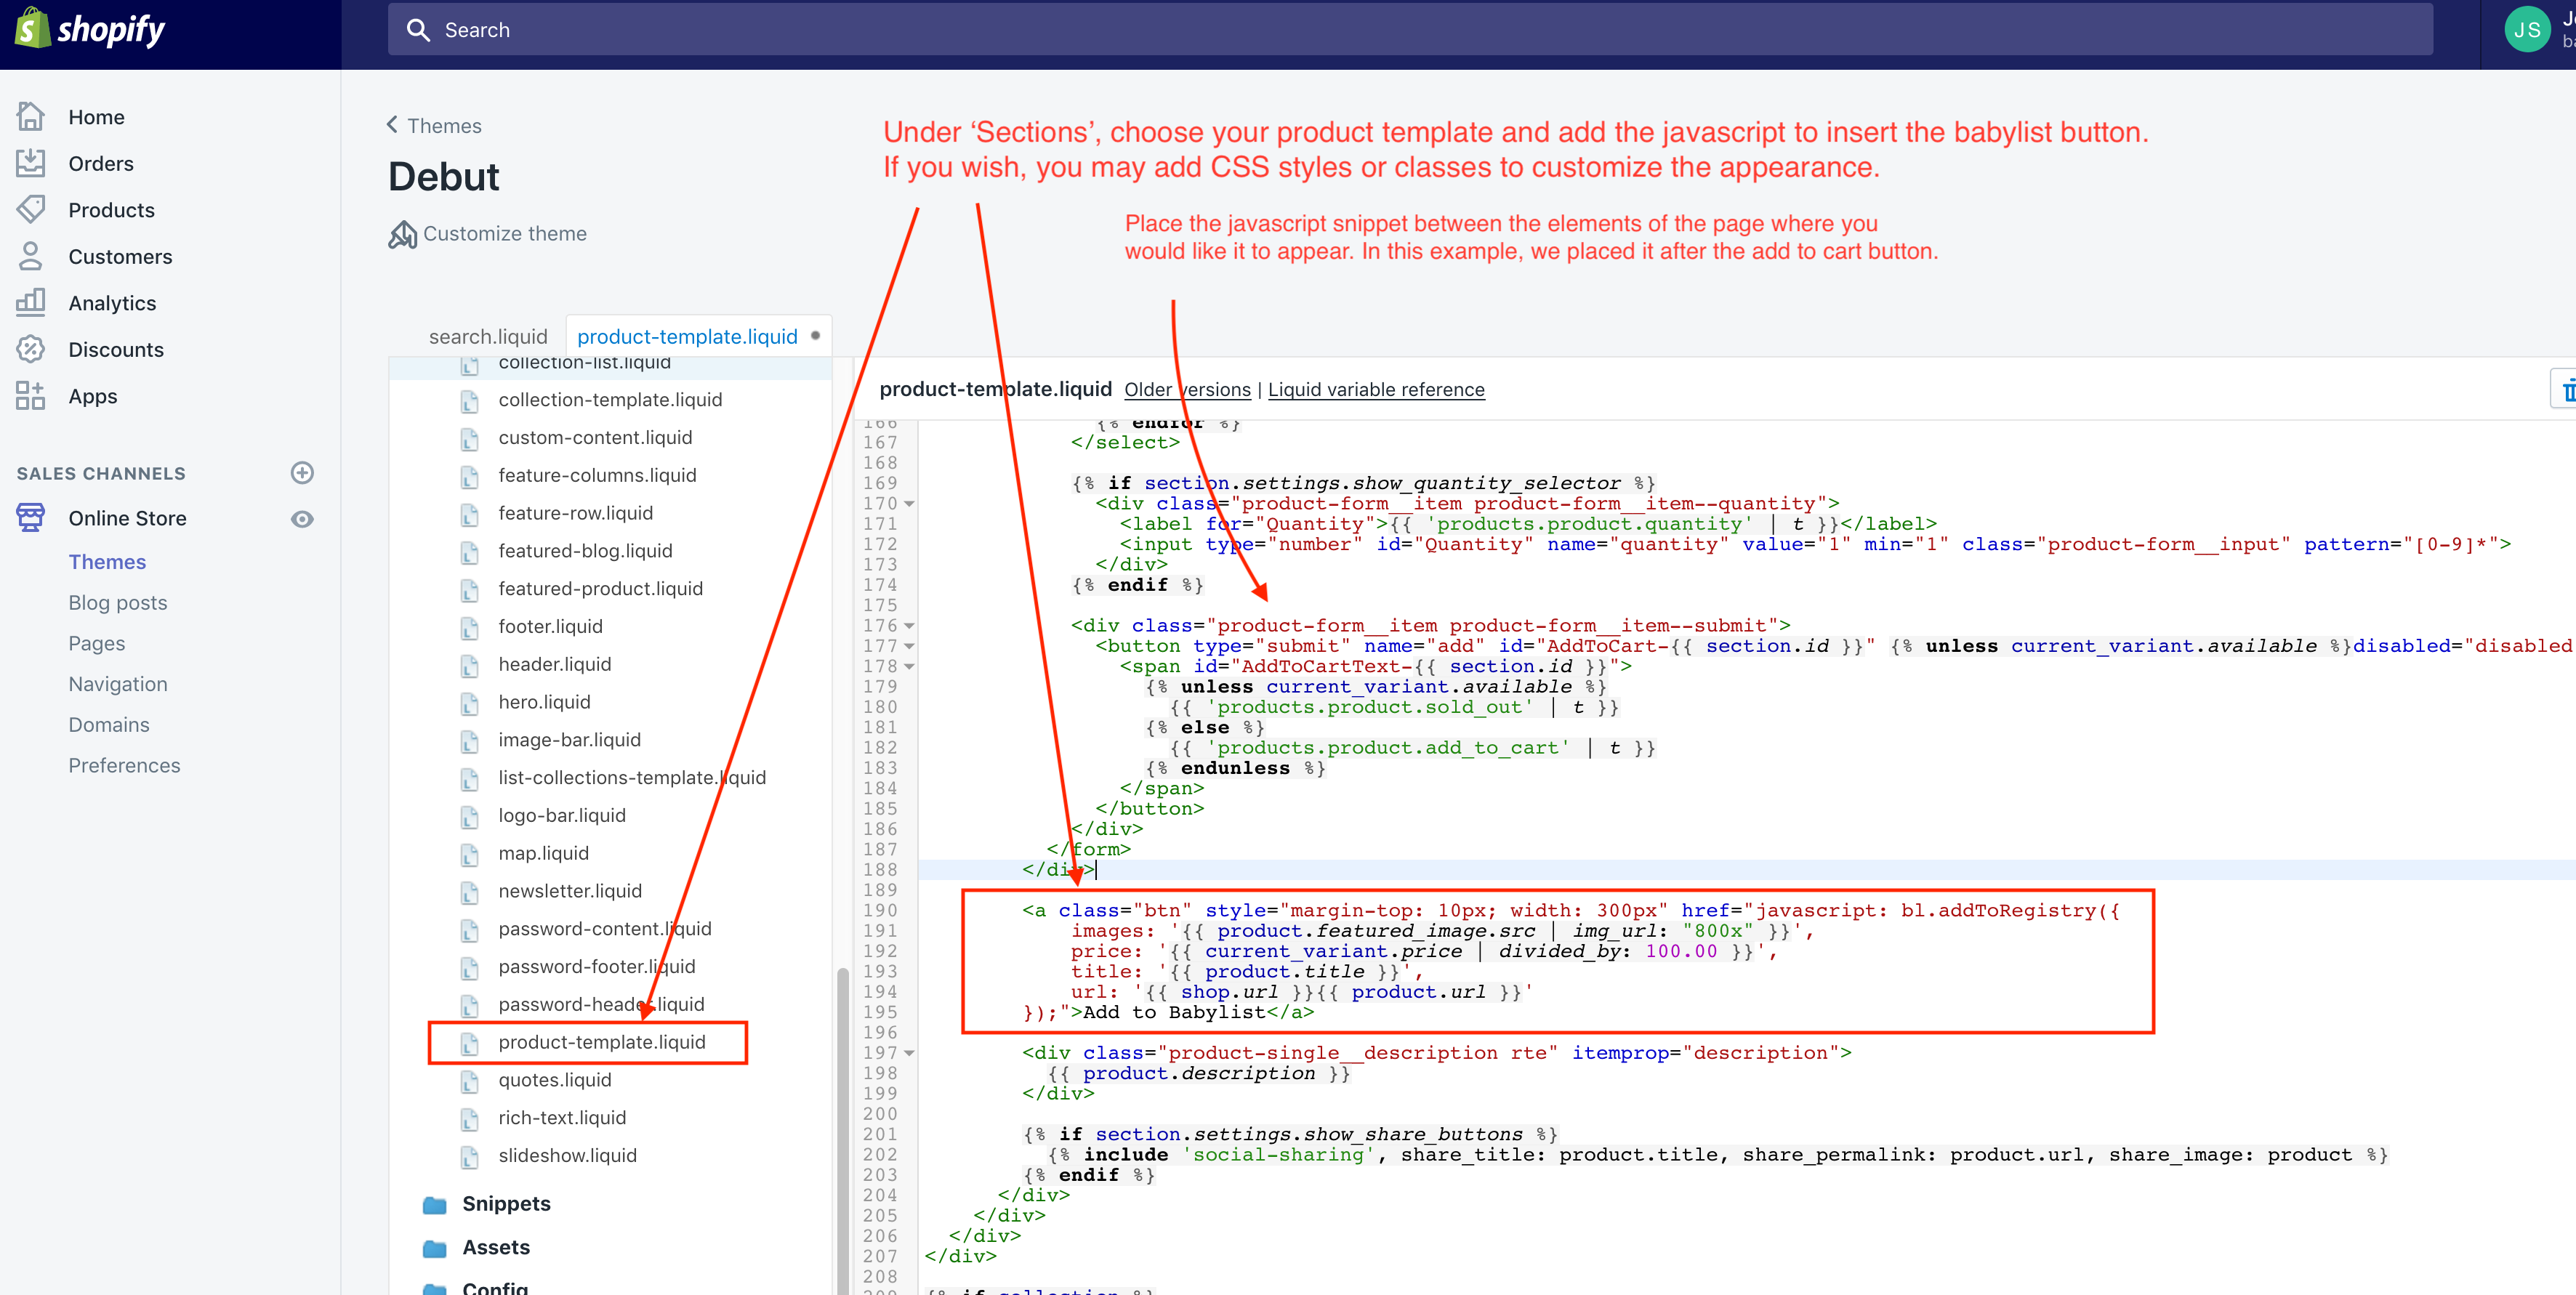
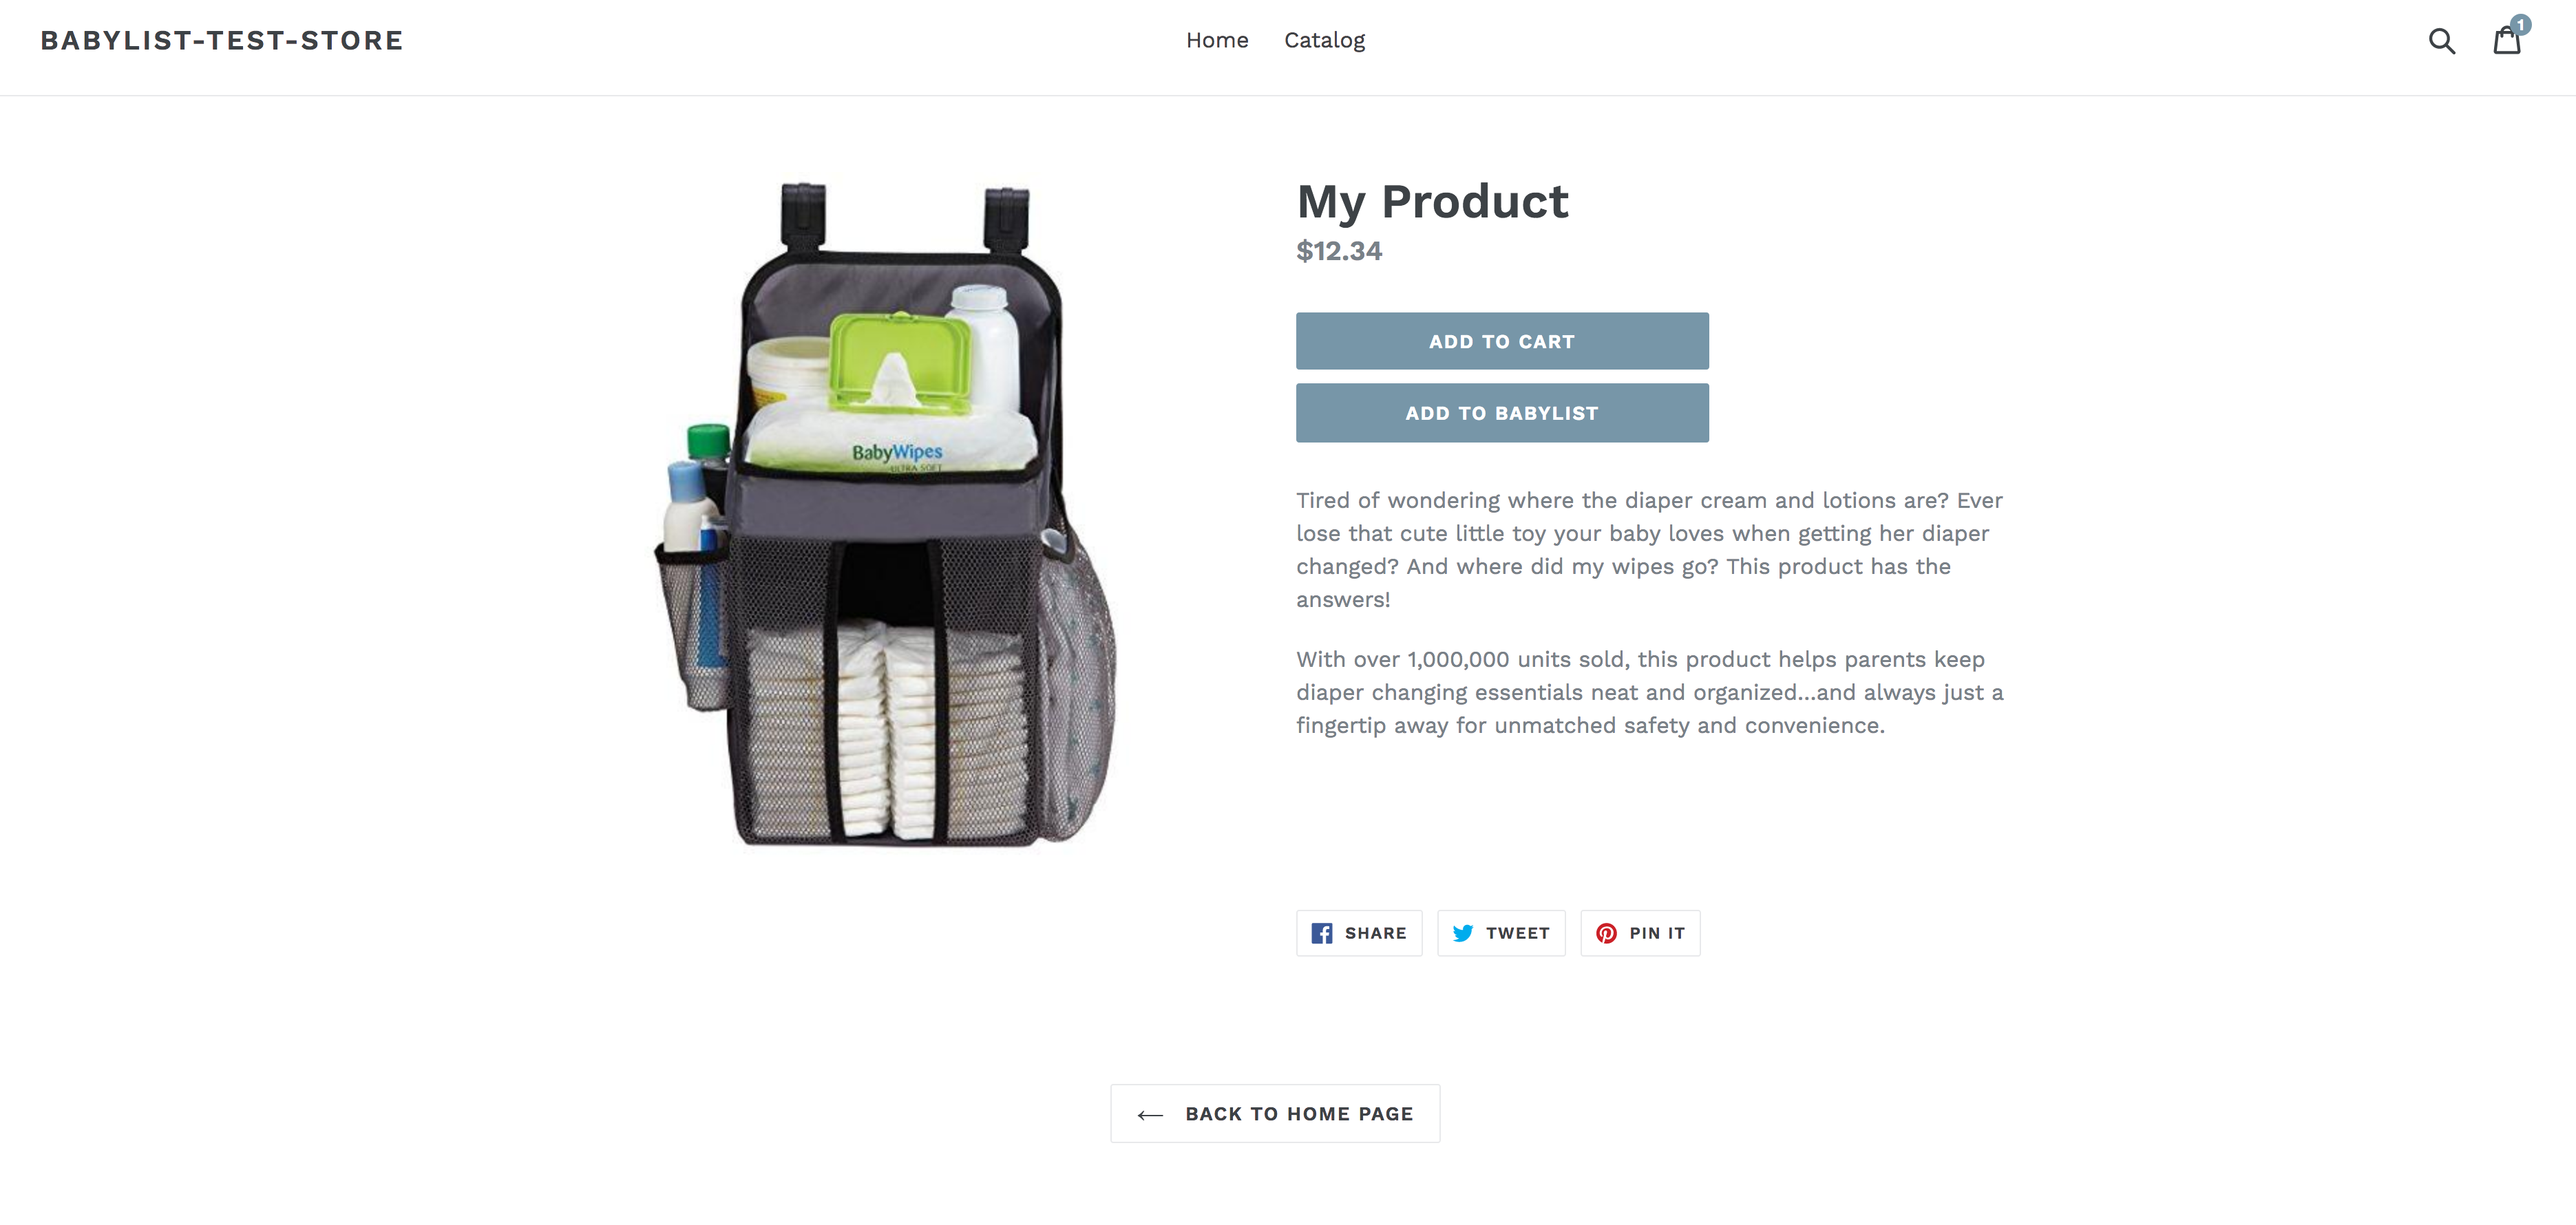
3. Test your product pages
You should now see links on your product pages to add the product to the babylist registry. Clicking on these links will bring up the modal.
Working With Variants (Advanced)
In order for the Add to Babylist button to detect when a user selects a different variant, you will need to add additional javascript to your theme.js template (usually found in the "Assets" folder). These instructions will vary depending on your Shopify theme, but in essence, the following needs to occur:
- Detect when a user selects a variant.
- Trigger a function that updates the
productInfofor the Add to Babylist button.
Example Configuration
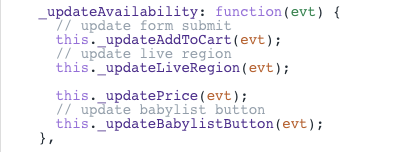
1. In theme.js, search for a function called _updateAvailability and within it add:
this._updateBabylistButton(evt);It should look something like this:
2. Next, underneath the _updateAvailablility function, define a new _updateBabylistButton function:
_updateBabylistButton: function(evt) {
  var variant = evt.variant;
  var product = this.variants.product;

  if (variant) {
    var data = {
      images: `${variant.featured_image ? variant.featured_image.src : product.featured_image.src}`,
      price: `${variant.price / 100}`,
      title: `${product.title} - ${variant.title}`,
      url: `${window.location}`
    };
    $('#AddToBabylist').attr('href', `javascript: bl.addToRegistry(${JSON.stringify(data)})`);
  }
},
The complete code snippet should look like this:
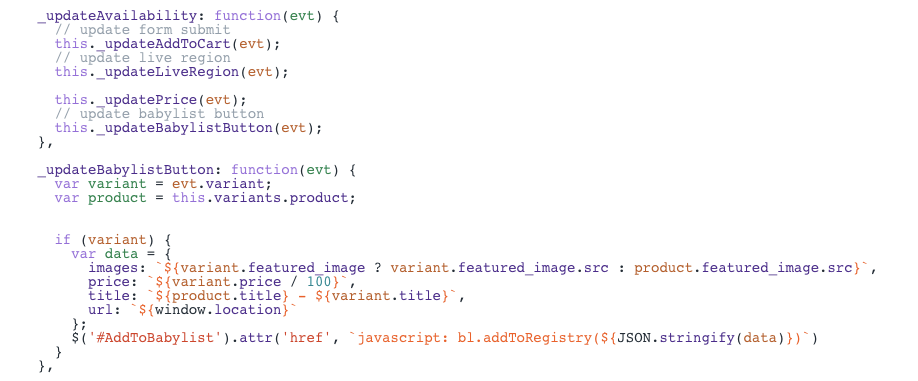
Save your changes, and check that the Add to Babylist button populates the correct info after switching between variants.
Content Security Policy (CSP)
Note: If your website uses Content Security Policy (CSP), you must include *.babylist.com in your CSP directives to allow our iframe to display properly. This is required for the Add to Babylist modal to function correctly.