
How to Clean a Car Seat
Your car seat is going to get dirty, so it’s important to know how to safely clean it.

In This Article
If there’s one universal truth about parenting, it’s this: Kids are messy. And this unfortunate reality is never more apparent than when your little one is strapped into their car seat
Even the best car seat on the market can be the ultimate magnet for dirt, crumbs, spilled milk, smushed up raisins and whatever bodily fluid your baby or toddler can throw its way. At some point, when you’re feeling extra brave, you’ll probably want to clean yours. But wait! 🛑
As a Child Passenger Safety Technician—a CPST, someone who's trained in car seat usage and education—I've seen many unsafe practices around car seat cleaning, most recently after an uptick in car seat cleaning services across social media. While it is possible to transform your soiled seat back to its original glory, there are some really important things you'll need to know BEFORE you bust out your scrub brush.
Read this before you tackle this dirty job.
➡️ Start Here: Safety
Basic car seat safety can help you understand why cleaning your car seat properly is a pretty big deal.
There are a lot of rules around car seats: Height and weight requirements, rear- versus forward-facing, detailed installation instructions...the list goes on.
That’s because, first and foremost, a car seat is a safety device. Its number one job is to protect your child in the event of a crash. But a car seat can’t do this job unless you follow all the (very) specific usage and care guidelines that apply to your particular seat.
So, although learning how to clean your little one’s car seat feels like one more item on your parenting to-do list, it's worthwhile.
🚫 Myths and Misconceptions
Dr. Alisa Baer, pediatrician, CPST and co-founder of The Car Seat Lady has helped hundreds of families select, install and care for their car seats. These are the most common myths and misconceptions she encounters about proper car seat cleaning.
Using the wrong cleaning products. Products matter—a lot. Cleaning products (even “natural” products like vinegar) can compromise the safety of a car seat. There are very few cleaning products that are safe to use on car seats, and these approved products also differ from seat to seat.
Assuming all seats can be cleaned in the same way. Different brands of car seats have different cleaning instructions, and what works for one seat may not work on another.
Improper reassembly. Failing to reassemble a car seat correctly after cleaning is a common and serious safety risk. Harness straps may be twisted, misrouted or placed incorrectly for a child’s height; pieces like chest clips or the splitter plate can be lost or reattached improperly. Well-meaning parents often get creative reconnecting parts—but in a crash, creativity can be dangerous. Even small mistakes can significantly compromise safety.
Trusting car seat cleaning service. While there are some car seat cleaning service companies that do follow proper cleaning methods, it’s often tough to figure out which companies are safe and which are not. Dr. Baer recommends skipping these services unless the company can tell you specifically what methods they’re using to clean your particular seat.
🧽 How to Clean a Car Seat
Follow these steps for cleaning your car seat.
1. 📖 Consult your manual
At the risk of sounding like a nag: read that manual!
“Different car seats allow for different cleaning methods,” says Dr. Baer. Before you even pick up a scrub brush, it’s important to learn the specifics for your seat.
Can't find your car seat manual? Other options include checking the brand’s website or calling the manufacturer and chatting with the customer service team. They’ll be more than happy to help and can go over the ins and outs of your particular seat so you know what’s safe—and what’s not.
2. 🪛 Grab your tools
These are the best tools of the trade for cleaning your car seat:
A clean rag
A bucket filled with water
A toothbrush or electric toothbrush (without toothpaste, of course!)
Cotton swabs
A screwdriver with a wet rag over the tip
AVOID Lysol, Clorox, bleach and any type of acid, including vinegar.
Pay special attention to the plastic and harness parts of your seat. “Car seats are exposed to extreme heat, so I try not to put anything on the plastic or harness that could affect the integrity of these parts,” says Dr. Baer.
3. 🚘 Go part by part
While it's possible to do some spot cleaning while your car seat is installed in your car, it’s best to remove the seat for a more thorough cleaning and work on a firm surface. (Many parents like to clean their seats outside in a yard or driveway to minimize the mess.) And kick things off by shaking out the car seat to remove any crumbs and then giving it a quick vacuum before you start deep cleaning.
Once that is done, tackle the job one part at a time—and follow the specific cleaning instructions for each.
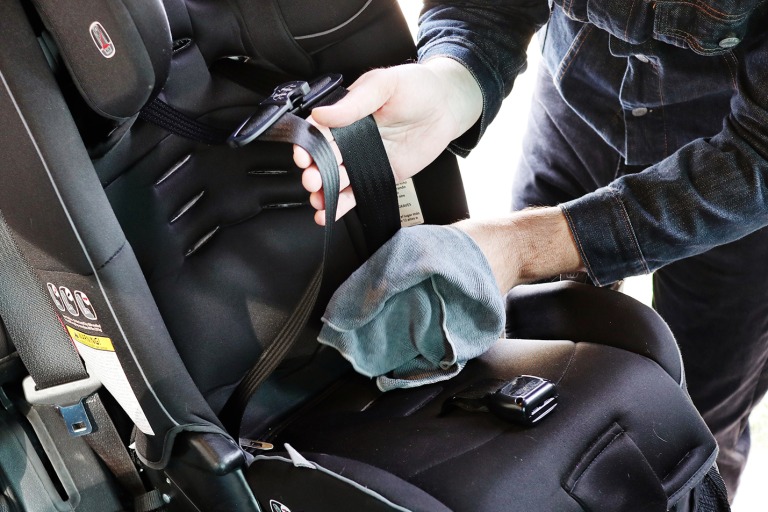
Straps
"Harness straps have micro elastic fibers that are there to provide a teeny bit of stretch in a crash and help decrease the forces applied to the child’s chest. This is why straps must be cleaned more carefully than some of the other parts of the car seat,” Dr. Baer says.
Use water (only water!) and a toothbrush to get in the nooks and crannies in the straps to get the yuck out. Never submerge the straps in water unless your seat manufacturer specifically approves it. If your straps are especially gross from something extra smelly, like vomit, you may want to consider reaching out to the seat’s manufacturer to learn if replacing them altogether is an option. (It usually is for most seats, and typically costs under $25.)
Crotch buckle
Most crotch buckles can be washed in warm, soapy water—but be sure to check your instruction manual just in case. After rinsing it out, immediately hang the buckle upside down to dry without the buckle tongues in it.
“This is important, as I’ve seen rusty buckles from car seat cleaning services that steam or something else that wets the area and they leave the crotch buckle right-side up and buckled in while it’s drying,” Dr. Baer says.
Fabric cover
Most car seat covers are machine washable, but never put them in the dryer unless your instructions specifically say to do so. (You risk disintegrating the backing in the high heat.) And remember to allow enough time for your car seat cover to air dry if you plan on washing it and using it again soon.
Plastic parts
Clean plastic parts with water (again: only water!) and your tools: a clean rag, a screwdriver with rag on the end to dig around the places you can’t reach with your hand, cotton swabs and a toothbrush.
💡Tips and Tricks
Keep these tips in mind when cleaning your seat:
Check those crevices. Crevices are where five-month-old Goldfish go to die. Use your tools to clean your car seat’s crevices for best results.
Use your phone. Snap a photo or take a quick video with your phone BEFORE you take apart your car seat. “You will NOT remember how to put it back together properly,” Dr. Baer says. “Errors can make the car seat unsafe in a crash. Refer to the manual when putting the seat back together as well, but oftentimes your pictures will be more helpful than the diagrams in the manual.”
Contact the manufacturer. Your car seat’s manufacturer is the best source of information on how to safely and effectively clean your car seat—don't hesitate to reach out before, during or after you clean your seat.
Wondering how to keep your seat looking new after you've safely cleaned it?
While car seat protector mats may sound like a good idea for protecting the area under your seat, use them with caution, says to Dr. Baer. Only use a mat if it's specifically approved by your seat's manufacturer.
If you have a puker on your hands, your best bet is to try to stop it in its tracks in order to avoid the cleanup. (These tips and tricks may help.) You may also want to check out a full-coverage bib like the Bib-On. Just remember to put the bib on after your little one is safely buckled and strapped into their car seat.