
How to DIY a Maternity Shoot You’ll Actually Love
Want professional-looking maternity photos without the professional price? Take your own with these tips.

By

A maternity photo shoot is something many people cherish during pregnancy. It’s a sweet opportunity to slow down, soak in the moment, and capture the excitement of welcoming a new little one. And if you plan on sharing an official pregnancy announcement, the photos you take can work well for that as well.
But with a photo shoot comes a professional photographer at a professional price. Whether you’re trying to keep costs down or you simply can't find the right pro, hiring a professional photographer might not be in the cards for you—but that doesn’t mean you have to skip the shoot.
Even if you don’t have a professional camera, if you have a phone or tablet with a camera, you can DIY your maternity photos (for free) and make them look like you paid a lot of money for them.
We talked with Babylist’s own Maddie Eisenhart, who has worked as a professional wedding, family and portrait photographer for 10 years, and gathered her top photography tips so you can shoot your own maternity photos with little to no help and little to no cost.
From what to wear that’ll translate best on camera to finding the perfect lighting, here are all of the tips to capture beautiful maternity photos at home (according to a professional photographer).
Before Your Photoshoot
Taking some time to think through the details and prepare for your photoshoot can ensure your day goes off without a hitch. Here are some things to consider.
Round Up Your Supplies
One of the best things you can invest in for DIY photos is a small cell phone tripod. You can get them for around $20-$30 on Amazon and most of them come with a wireless remote that lets you snap the photo from far away. For outdoor photos, a flexible tripod can be really handy because it lets you wrap the legs around objects, like tree limbs or fence posts. A tripod isn’t a requirement, but it can make things easier.
As far as a camera, your cell phone camera can deliver crisp, beautiful photos. If you have a professional-style camera that you’d prefer to use, that works too. Just make sure you grab a tripod that works with your camera of choice.
Choose a Camera-Friendly Style
All-white or all-black outfits can be trickier to photograph, especially in uneven lighting, so you might try softer or varied tones instead. The other rule is to avoid any really small patterns (especially pinstripes), as they tend to warp on screen. Otherwise, have fun with your outfits. Tight-fitting clothing is more likely to show off your bump.
And if you’re going to wear makeup, apply about 20 percent more than you would in real life, like a slightly heavier foundation than you might normally wear, or maybe a more dramatic eyeshadow. If you're not a makeup person at all, you might wear a tinted moisturizer and some lip gloss instead. Photos tend to downplay makeup, so the extra will make up the difference.
Tag in an Assistant (or Partner or Friend)
It is far easier to do DIY photos if you have someone else taking the pictures. If you plan to ask for help, you don’t have to find a professional. Your most social media-obsessed friend, who manages to create the most aesthetically pleasing Instagram grid, will do just fine. You essentially just want someone who knows how to capture your best angles in the best lighting.
If you have a helper and want the effect of a full maternity shoot, have them shoot lots of different angles of the same scene. Far away, close up, just your belly, from above, from the side, etc. It will look like you did a lot when, in reality, you just had your helper move their feet.
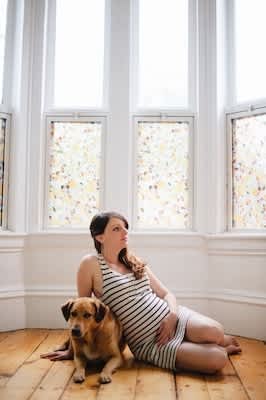
Choose a Well-Lit Location
The two most important factors for good photos are lighting and location. If you’re taking your photos on a bright, sunny day, heading outdoors is a good option but you want to avoid blowing out your images with too much sunlight. Look for open shade (that’s when it’s generally bright outside, but the sun isn’t shining directly on your backdrop). Under a tree or in front of a shaded wall are tried-and-true standbys for open shade.
But if you want a wide-open image in the great outdoors, just time your photos for the “golden hour” (that’s the first hour after sunrise or the last hour before sunset). Without the harsh glare of the sun, you can take pictures pretty much anywhere, and the golden glow will make them look professional.
One pro tip: If you don’t have the option to shoot in golden hour and it’s too bright outside, put your body directly in front of the sun. It’ll block the harsh rays and give you a nice glow.
If you’re staying indoors, cool lighting and epic backdrops might look amazing in professional photos, but they can be frustrating to work with if you’re not a pro yourself. Often, the best photos will come from a simple backdrop (like a colorful wall in your neighborhood or just the comfort of your own bed) where you and your bump can really shine.
During Your Photoshoot
From posing to trying out fun props, here are some tips to help make your photos turn out beautifully.
Finding the Most Flattering Poses
For a basic stand-and-pose picture, try putting your hands on the top and bottom of your bump if you want it to stand out, and pose with your bump to the side instead of straight on. Bending a knee or shifting your hip can also help make the pose appear more natural. (There’s a saying in photography that if you have a body part, bend it!)
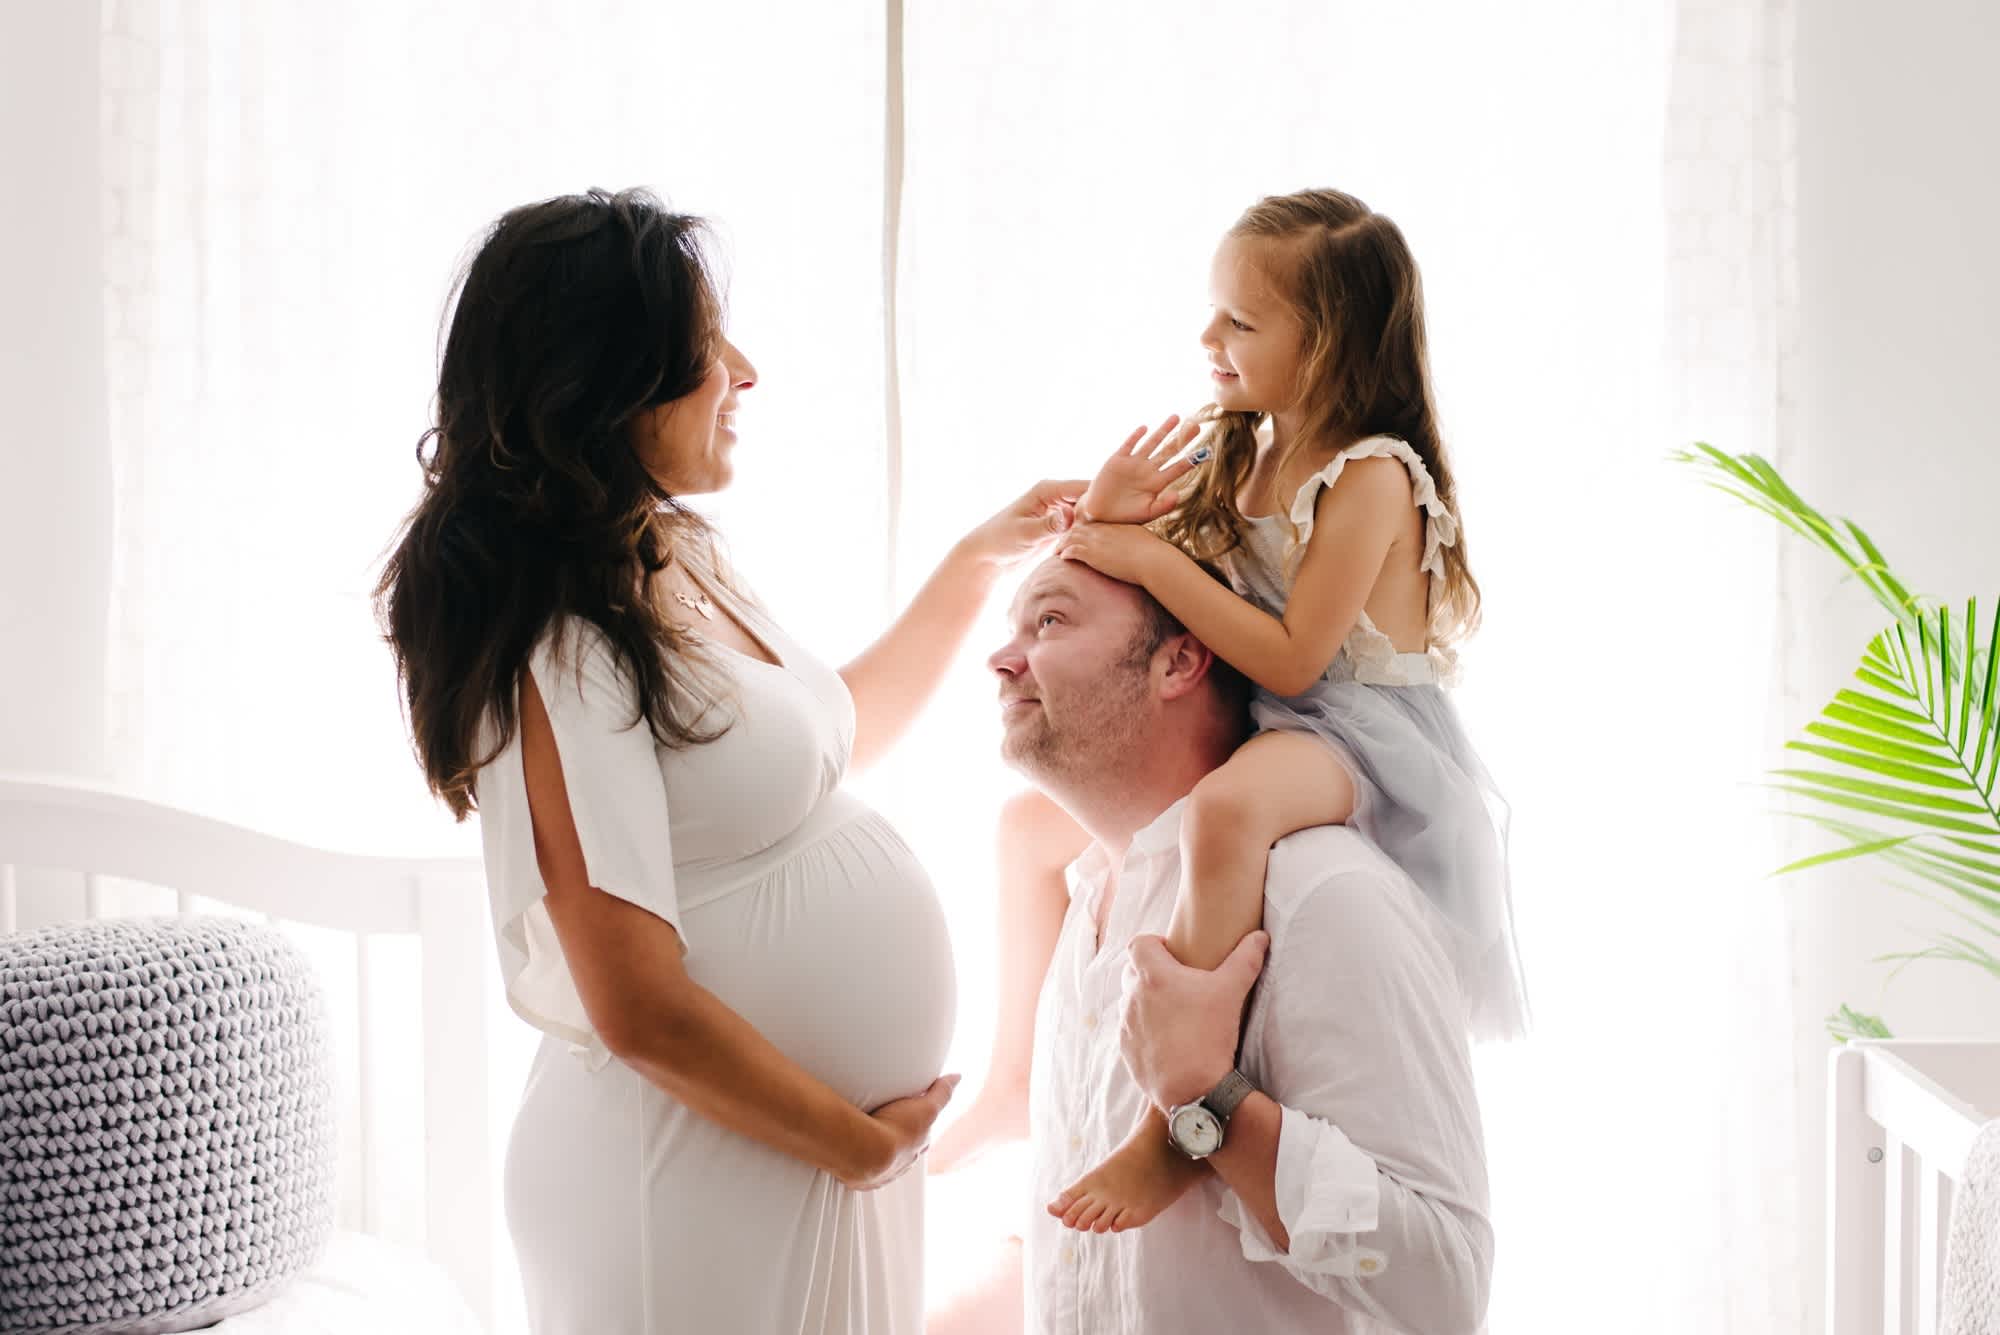
Otherwise, movement is your friend when it comes to natural-looking photos. If you have someone helping you take pictures, practice walking slowly towards them, making eye contact with the camera and then looking away. If you’re taking photos with your partner or your children, focus on each other instead of the camera. And get creative with your body. If standing and posing feels weird, try sitting or lying on your bed and shooting from above.
Consider Adding Fun Props
Props work best when they serve a purpose. A clever letter board or a pair of baby shoes can give your hands something to do and add some visual interest to your photos (especially as a close-up). You can also use props to give you a distraction for more natural-looking photos.
Sometimes posing and looking at the camera can feel awkward, but having an activity—like throwing confetti or looking down at a set of letter balloons—makes it easier to get a natural shot. Just remember that if you’re taking the photos yourself (aka using a timer or remote), you’ll need at least one hand free to press the shutter button.
Decide if You’ll Invite Others to Join the Photoshoot
If you have other kids, pets or want to incorporate your partner into your photos, the less posed, the better. For small children, it can be helpful to give them an activity or direction (such as kissing the baby bump, talking to the baby, or singing a song to the baby).
And manage your expectations around how long they’ll participate. Get your photo all set up, and ask your little one to join in only when you’re ready to hit that shutter button. Then expect them to lose interest after a minute or so. If your phone or camera has burst mode, use it. You’ll have a better chance of getting one solid photo if you take 50 rapid-fire shots in a row.
If you want to involve your kids or pets, they’ll probably want to be part of something exciting that they aren’t a part of.

After Your Photoshoot
Once you’ve wrapped up your DIY photoshoot, it’s time to do a quick edit to clean up your pictures and send them to print (if you plan to display them).
Edit Your Photos
Editing photos on your phone is easier than it’s ever been and the results are surprisingly high quality. VSCO, A Color Story and Lightroom Mobile are all available on Android or iOS and are really solid options for quick and easy editing. VSCO is great for more natural or film-like presets, A Color Story is good for bright images with strong colors and Lightroom Mobile has a lot of flexibility for natural editing. And don’t stress about getting edits perfect—small tweaks go a long way.
Pro tip: natural presets are easier to work with, but sometimes it takes a few tries to find one that works best with your photo. And when in doubt, increase your brightness and contrast (a little, not a lot) to make your images pop.
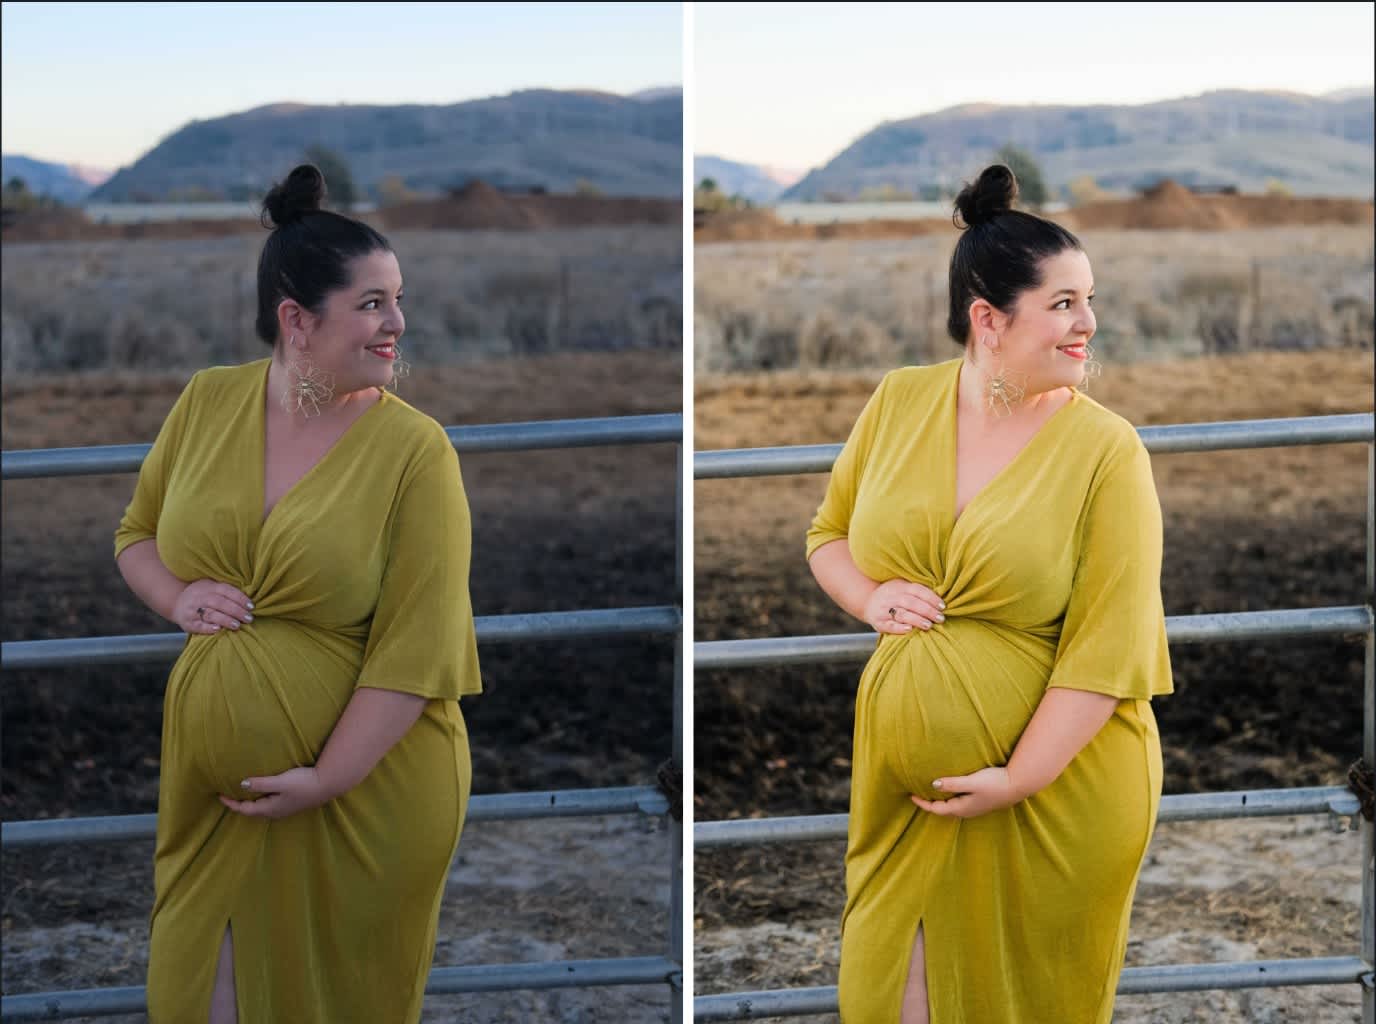
(Photo credit: Maddie Eisenhart. Edited using Lightroom Mobile and Madison Short Presets)